How to Schedule a Visit Using Visitation Scheduling Application (VSA)
VSA allows Friends and Family to schedule visits from a variety of web enabled devices including computer, smartphone and tablet. Get familiar with our visiting guidelines and make sure you are approved to visit before using VSA. If it’s your first time using VSA, you’ll need to claim your account before you can schedule a visit.
Schedule visits at the time designated for the institution listed below.
Northern Region VSA request period will open from 6 a.m. to 11:59 p.m. for the following institutions in the Northern region:
- California Correctional Center
- Central California Women’s Facility
- California Health Care Facility
- California Medical Facility
- California State Prison – Sacramento
- California State Prison – Solano
- Folsom State Prison
- High Desert State Prison
- Mule Creek State Prison
- Pelican Bay State Prison
- Sierra Conservation Center
- San Quentin State Prison
- Valley State Prison
Central Region VSA request period will open from 6:30 a.m. to 11:59 p.m. for the following institutions in the Central region:
- Avenal State Prison
- California Correctional Institution
- California Men’s Colony
- California State Prison – Corcoran
- Correctional Training Facility
- Kern Valley State Prison
- North Kern State Prison
- Pleasant Valley State Prison
- Substance Abuse Treatment Facility and State Prison – Corcoran
- Salinas Valley State Prison
- Wasco State Prison
Southern Region VSA request period will open from 7 a.m. to 11:59 p.m. for the following institutions in the Central region:
- California City Correctional Facility
- Calipatria State Prison
- Centinela State Prison
- California Institution for Men
- California Institution for Women
- California Rehabilitation Center
- California State Prison – Los Angeles County
- Chuckawalla Valley State Prison
- Ironwood State Prison
- Richard J. Donovan Correctional Facility
The request period begins eight days prior to the visitation day and closes five days prior to the visitation day. See the table below for examples.
| Day of Visit | Request Window Opens | Request Window Closes |
|---|---|---|
| Friday, December 17 | Northern: 6 a.m. Central: 6:30 a.m. Southern: 7 a.m. Thursday, December 9 | 11:59 PM Sunday, December 12 |
| Saturday, December 18 | Northern: 6 a.m. Central: 6:30 a.m. Southern: 7 a.m. Friday, December 10 | 11:59 PM Monday, December 13 |
| Sunday, December 19 | Northern: 6 a.m. Central: 6:30 a.m. Southern: 7 a.m. Saturday, December 11 | 11:59 PM Tuesday, December 14 |
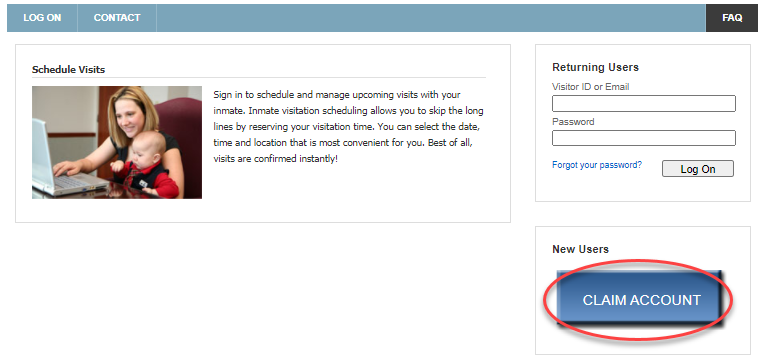
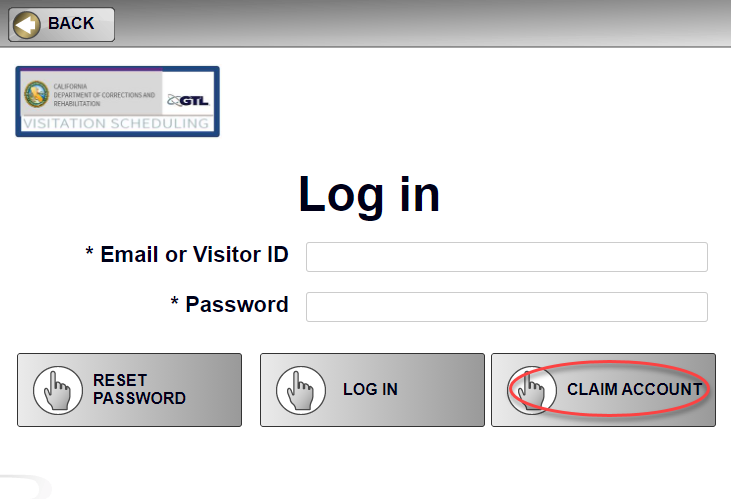
- Friends and Family (also referred to as visitor) go to the visitor website and click Claim Account.
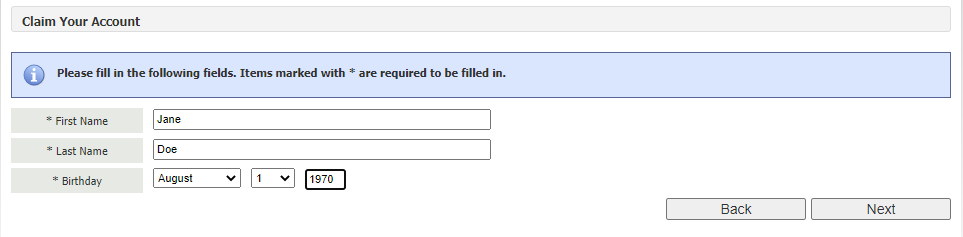
- Type your First Name, Last Name and Date of Birth.
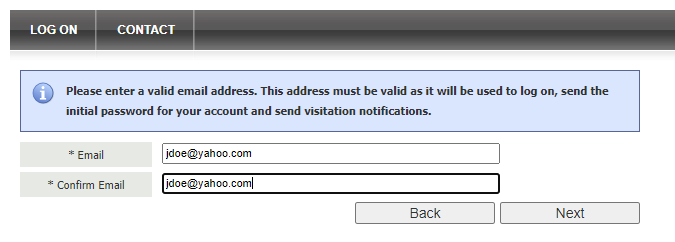
- Add and confirm your Email Address. Select Next.
- Complete the remaining fields with all Personal Information. Click on the checkbox to run the robot test. Review the information and when you are ready, select the checkbox to verify that all information is correct, and then click the Finish button.


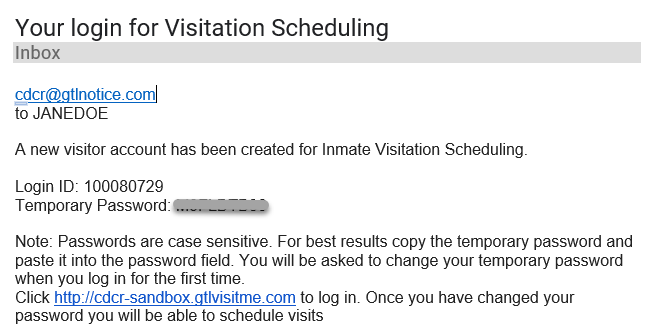
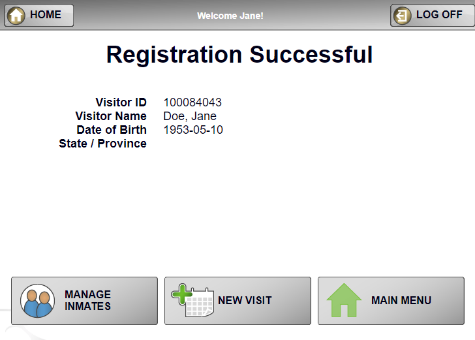
- Once your account is created, you will receive your Visitor ID. It is very important to write down the number, print the summary page, or take a screenshot of the following screen for your records.

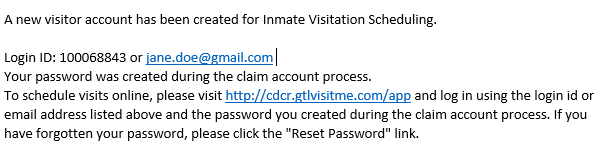
- Look for an email from cdcr@gtlnotice.com with your temporary password.
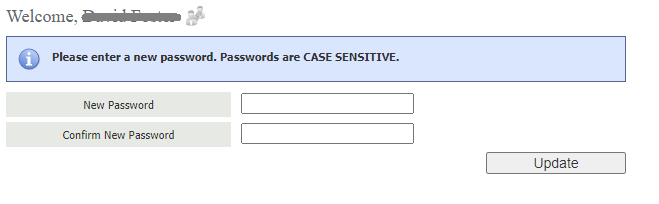
- Starting from the visitor website, sign into your account with your temporary password. You will then be required to change your password. Enter and confirm a new password, and then click Update.
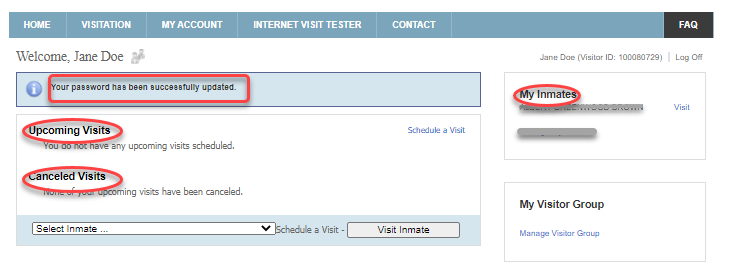
- Once your password has been successfully reset, the Home page of the visitor website will be displayed with any upcoming visits, a list of associated (approved) inmate names, and any canceled visits.
Claiming Your Account – Mobile Device
- Friends and Family (also referred to as visitor) go to the Visitation Scheduling website and click Claim Account.
- Type your First Name, Last Name and Date of Birth. Click Next.

- Add and confirm your Email Address. Select Next.

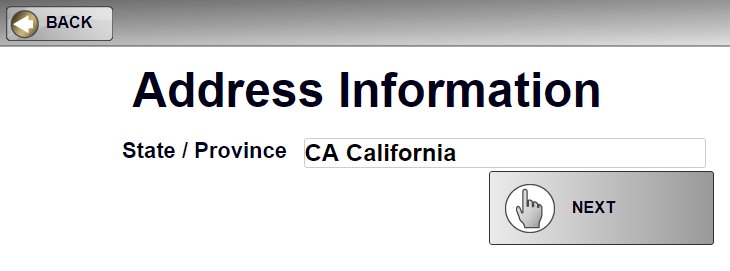
- The Address Information screen will display (showing California). Click Next.
- You will then be required to set your password. Enter and confirm a new password, and then click Next.
A confirmation email with login information is sent from cdcr@gtlnotice.com.

- Review policies and then click Accept Policies and Submit.

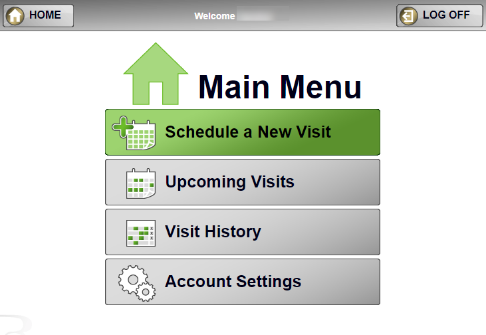
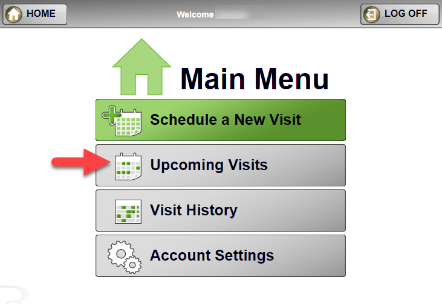
- From the Registration Successful screen, select New Visit to go directly to scheduling a visit. Or select Main Menu to schedule a new visit, display upcoming visits, view history, and manage account settings.
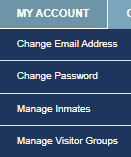
You can organize your account by going to the My Account menu where you can manage your email address, password, inmates, and visitor groups.
You can organize your account by going to the Main Menu and selecting Account Settings. From here you can manage your password, personal information (email address), visitors, and inmates.

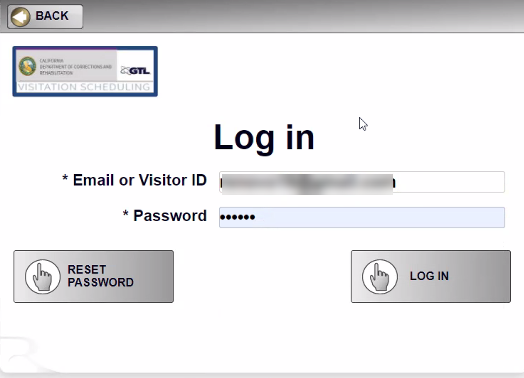
- Login to the Friends and Family visitor website with your visitor ID or email and password.
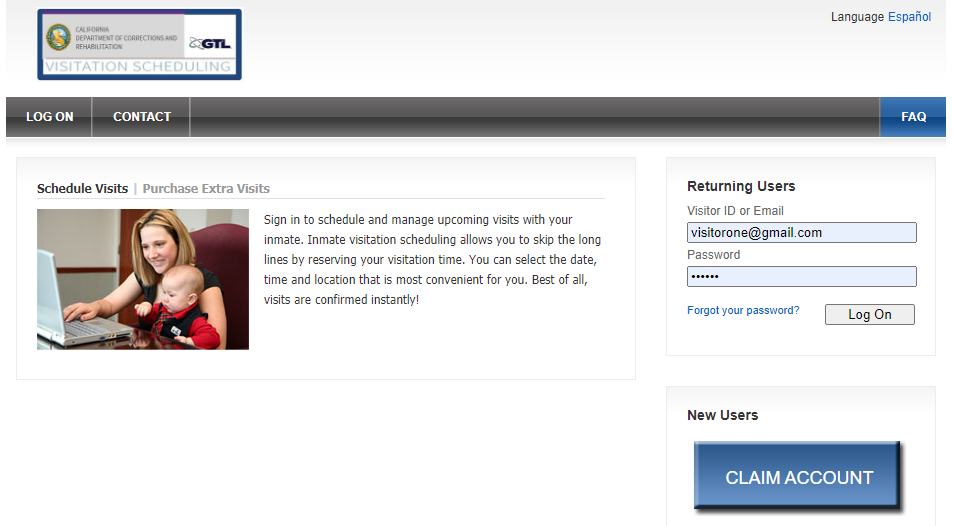
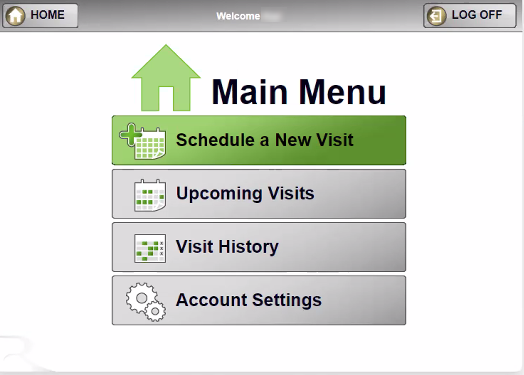
- The Visitation Scheduling Home page displays:
- Upcoming visits
- Canceled Visits
- My Inmates (approved list)
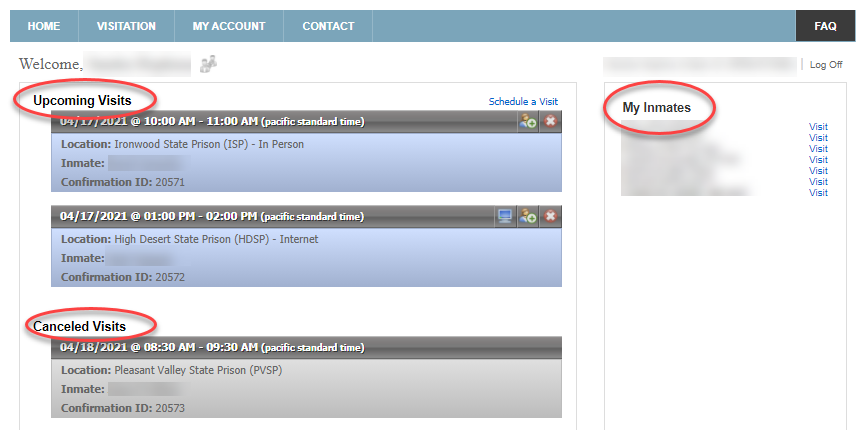
- Click on the Visit link next to the inmate’s name from the My Inmates list to schedule a visit with them.

- Choose Visitor (select yourself) or select multiple Visitors (additional visitors must be approved to visit).
A visitor can send another approved visitor a friend request via the Manage Visitor Groups option under the My Account Menu. This means both visitors would be able to visit the same inmate together. Both visitors must be approved to visit the inmate.
- Click Next.
- Select available Date from calendar.
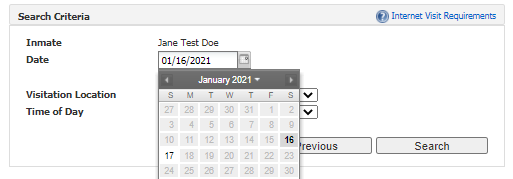
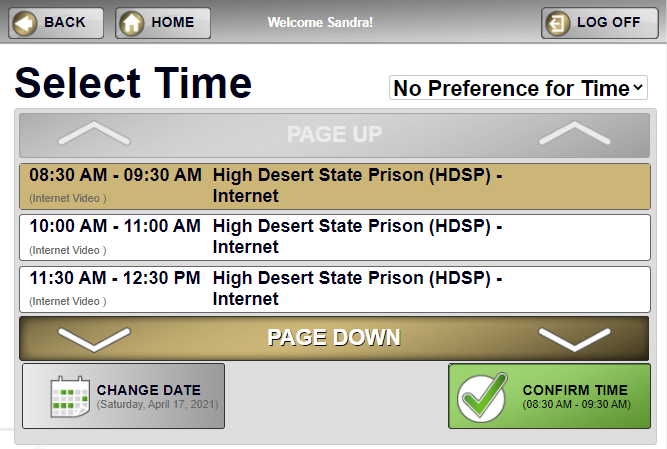
- Select the Visitation Location (Facility and Video Station location) and the Time of Day. Click Search.
IMPORTANT NOTE: Because institutions are currently offering a variety of video visit options, it is recommended to select No Preference to show all available visits for all visitation centers at an institution.
For example, institutions may be providing In Person Only visits, Internet Only visits, or a hybrid of In Person and Internet visits. The available days for in person visits may also vary per institution.

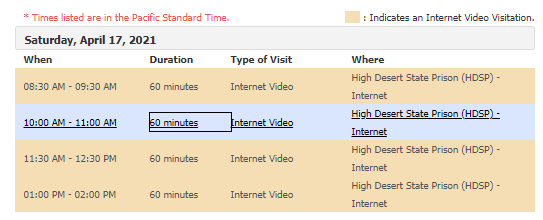
- Select the desired time slot from the displayed options. Only available times will display.

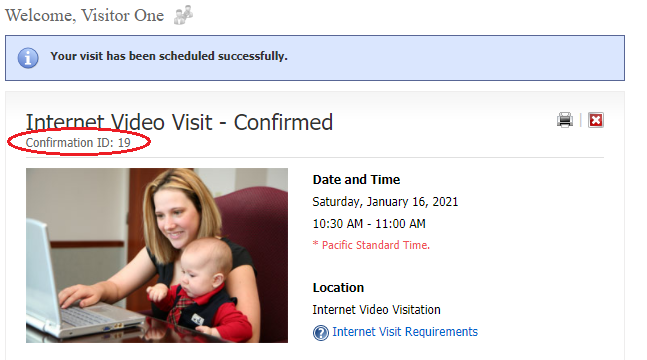
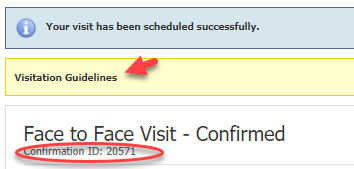
- Review visit information and click Confirm.
- Type of Visit – Internet Video Visit or Face to Face Visit
- Status
- Date, Time, Location (map will display for Face-to-Face Visit)
- Inmate name
- Visitor name, Relationship
- Visitation Policies
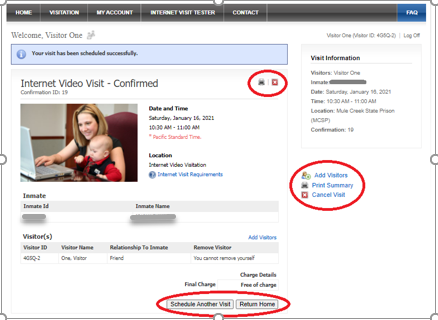
- Once the visit is confirmed, a unique confirmation number is added and a confirmation email will be sent to you with visit information.
- Additional functions from the confirmation screen:
- Schedule another visit
- Return Home
- Print Summary
- Cancel Visit
Schedule A New Visit
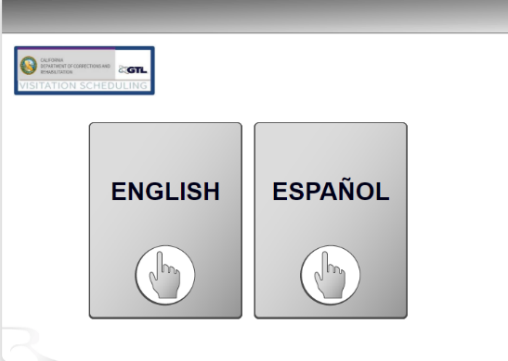
- Click English or Spanish
- Login to the Visitation Scheduling website with your visitor ID or email address and password.
- The Visitation Scheduling Home page displays.
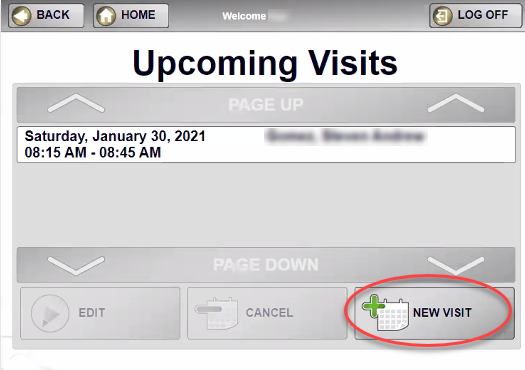
- To see a list of previously scheduled visits, click on the Upcoming Visits link. From this screen you can schedule a new visit. Click on the New Visit button to add a new visit.
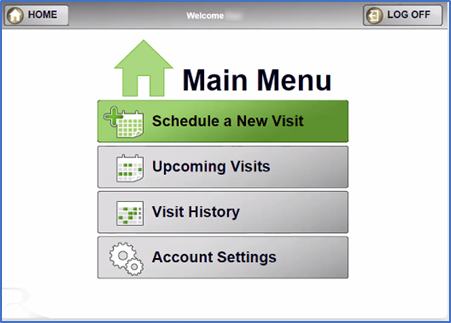
- You can also schedule a new visit from the Main Menu by selecting Schedule a New Visit.
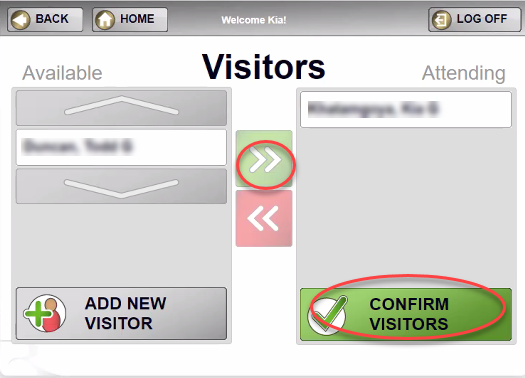
- A list of all approved visitors will display (or select the button on the bottom left to request a visitor be added). Select a Visitor(s) from the Available column by using the green arrow to move them to the Attending column. Click Confirm Visitors.
- Select the applicable inmate name and then click the Confirm Inmate button.

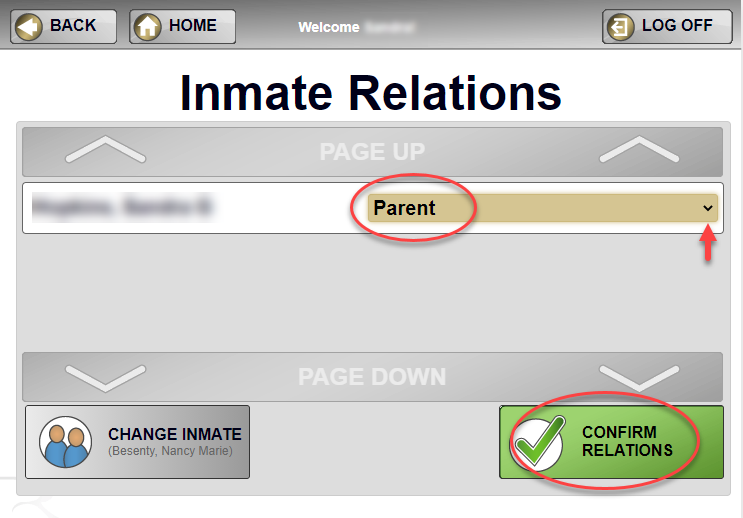
- Use the drop-down menu to select the applicable inmate/visitor relationship. Click Confirm Relations.
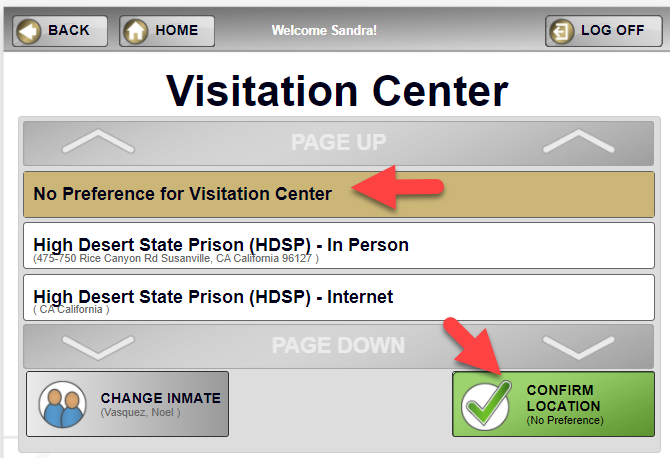
- Select the Visitation Center.
IMPORTANT NOTE: Because institutions are currently offering a variety of video visit options, it is recommended to select No Preference to show all available visits for all visitation centers at an institution.
For example, institutions may be providing In Person only visits, Internet Only visits, or a hybrid of In Person and Internet visits. The available days for in person and internet visits may vary by institution.
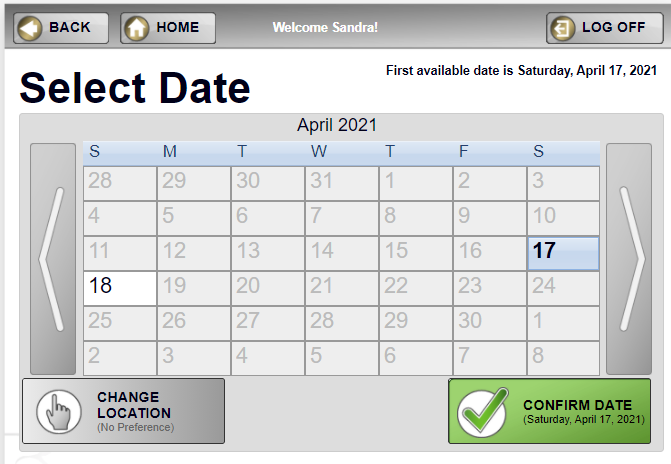
- Select an available visit date from the Calendar (displayed in white). Click Confirm Date.
NOTE: Depending on which day you select will determine whether In Person or Internet visit time slots will be displayed on the next screen after clicking Confirm Date.
- Select the desired Time from the list. Only available time slots will display. Click the Confirm Time button
- Review the details of your reserved visit.
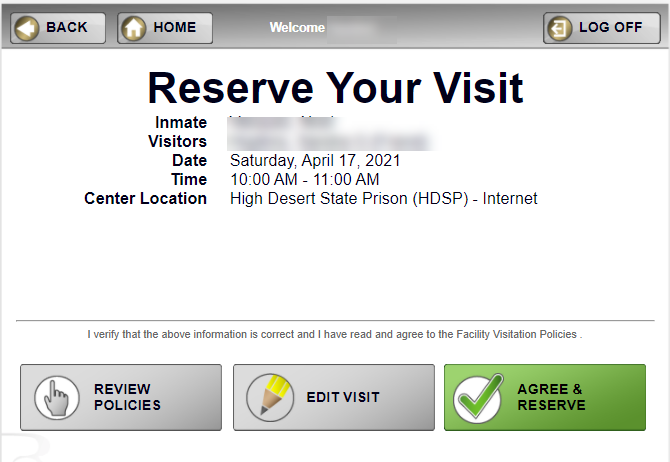
- Click Edit to change a visit. Select the field to be changed (Inmate, Visitor, Date, Time, or Location) and click Edit. You will be re-directed back to the applicable area to make the change. It is important to note, if you need to change an inmate name, visitor name, date or time while making a visitation appointment, it must be done before selecting the Agree and Reserve button. Otherwise, you will need to cancel the visit and reschedule the visit.
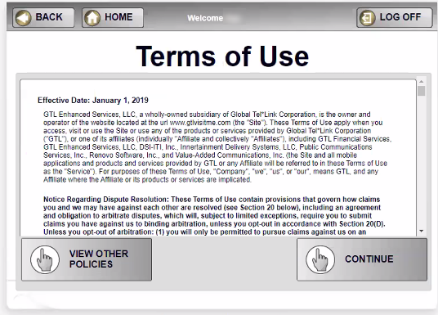
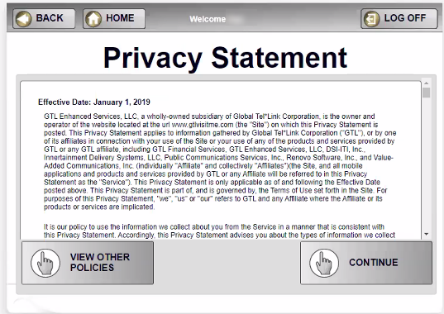
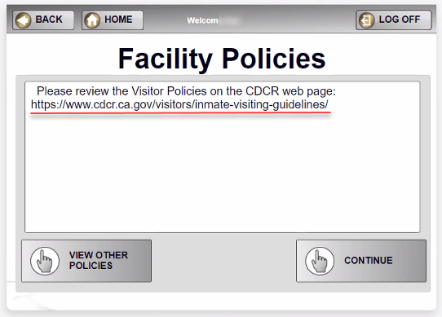
14. Click on the Review Policies button to see the Terms of Use, Privacy Policies, and Facility Policies.
- Click Agree & Reserve to confirm the visit. A unique confirmation number is added and a confirmation email will be sent to you with visit information.

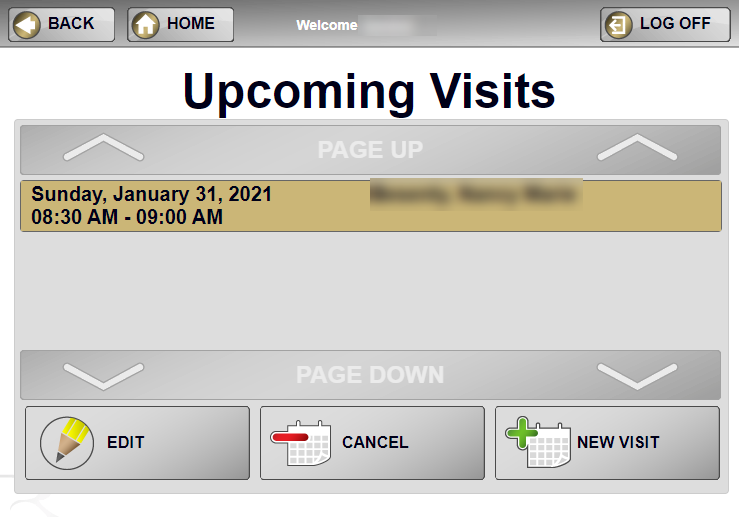
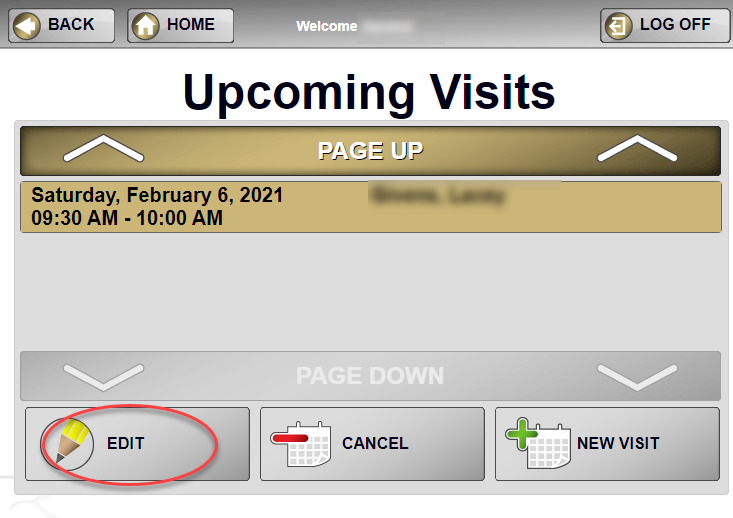
Once a visit has been scheduled, the Upcoming Visits screen allows you to:
- Edit a visit
- Cancel a visit
- Add a New Visit
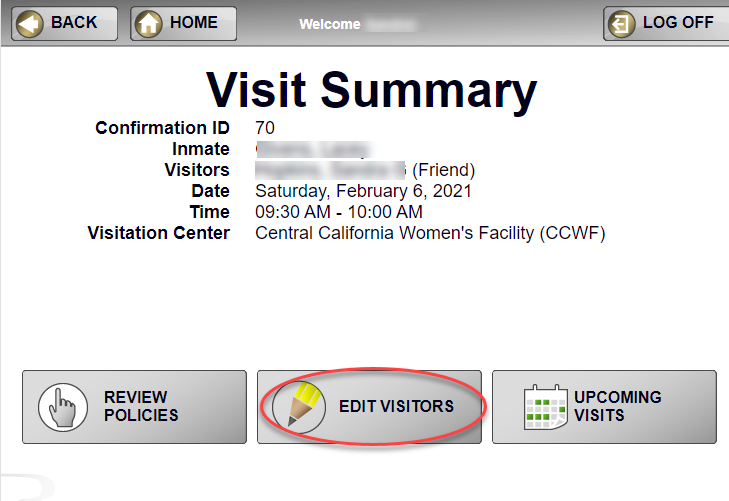
Once a visit is confirmed, you can only add/remove visitors. If you need to change an inmate name, visitor name, date, or time, you must first cancel the visit and then reschedule it.
- To add or remove a visitor from an already confirmed visit, click View Upcoming from either the Visit Summary screen or the Main Menu screen.

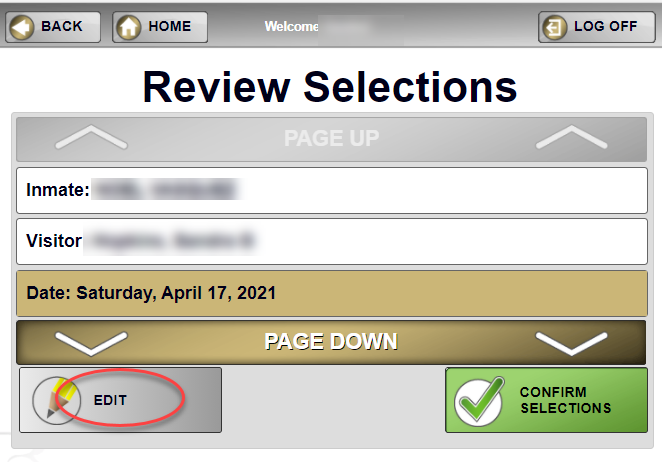
2. Select the visit that needs to be changed. Click Edit. You will be re-directed back to the Visit Summary screen.
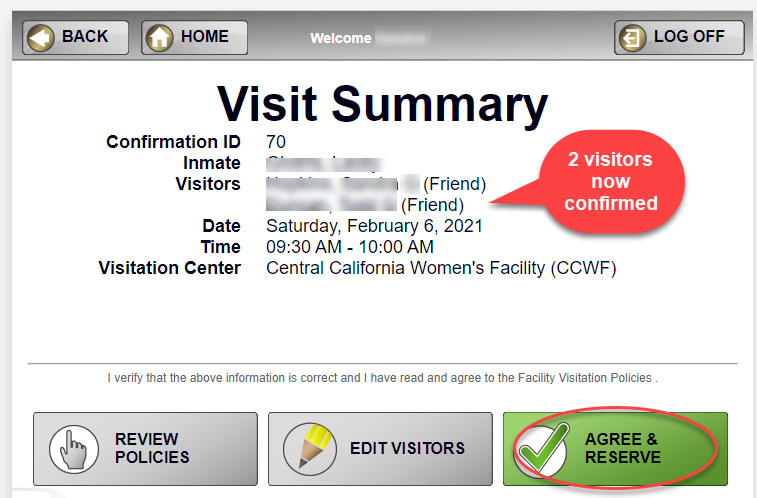
- Click Edit Visitors. Use the green and red arrows in the center of the screen to add or remove approved visitors to your existing visit. Click Confirm Visitors.

- The updated Visit Summary screen will display with visitor changes. Click Agree & Reserve to reconfirm the visit with updated visitors. This example shows the visit was modified to reflect two visitors.
CDCR inmates are allowed one free video visit per month with Friends and Family. Quotas (number of visits inmates get per day/week/month) are determined by CDCR and are configured into the visitation scheduling system. When a visit is canceled, the quota for that inmate is automatically reset.
- Friends and Family can go the visitor website to cancel a scheduled visit.
- To cancel a visit from the visitor website, click on the Cancel Visit link on the Home page.
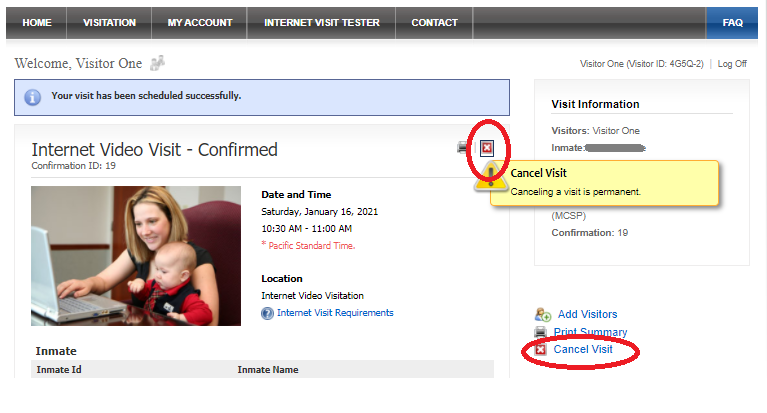
- Confirm the cancellation by clicking Yes or No.

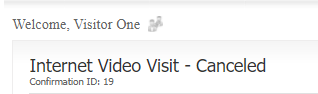
- The visit status is updated to Canceled and is displayed on the Visitor Home Page. In addition, a cancellation email will be sent your email account confirming the cancellation.

CDCR inmates and visitors are allowed one free video visit per 30 days with Friends and Family. Quotas (number of allowed per day/week/month) are determined by CDCR. When a visit is canceled, the quota for that inmate/visitor is automatically reset.
- Friends and Family can go the Visitation Scheduling website to cancel a scheduled visit.
- From the Upcoming Visits screen, select the applicable visit to be canceled and click the Cancel button.
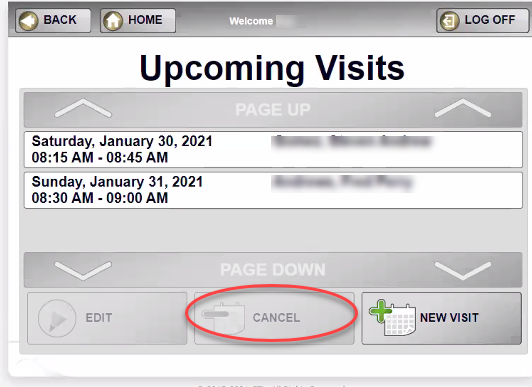
- Confirm the cancellation by clicking Cancel Visit.

- The visit status is updated to Canceled. In addition, a cancellation email will be sent your email account confirming the cancellation.

Look for an email from WebEx with details for how to join your video visit.
For more information on “How to Use WebEx to Join a Video Visit”, you can also refer to CDCR’s Web Site:

Join your video visit from your computer, mobile device, phone, or a video conferencing system. You may pick the one that works best for you. All video visits are secure. The communication is encrypted and CDCR processes ensure that approved visitors are validated and only those approved visitors may join the visit.
For technical assistance with VSA, contact the Visiting Sergeant or Lieutenant of the institution you wish to visit.
DO NOT contact GTL for technical assistance.